vue学习-零碎
2022年10月26日
1-项目构建
npm修改镜像源:
npm config set registry https://registry.npmmirror.com/
安装vue-cli:
npm install --global vue-cli
创建项目:
vue create demo01
安装饿了么:
npm i element-ui -S
main.js完整引入:
import ElementUI from 'element-ui';
import 'element-ui/lib/theme-chalk/index.css';
Vue.use(ElementUI);
安装axios
npm install --save axios vue-axios -g
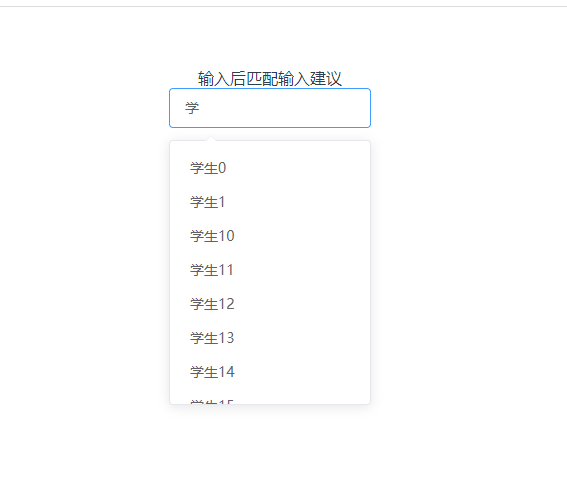
2-带输入建议的输入框学习
拷贝html:
    <el-col :span="12">
      <div class="sub-title">输入后匹配输入建议</div>
      <el-autocomplete
          class="inline-input"
          v-model="state2"
          :fetch-suggestions="querySearch"
          placeholder="请输入内容"
          :trigger-on-focus="false"
          @select="handleSelect"
          @input="loadAll"
      ></el-autocomplete>
    </el-col>
双向绑定state2:
  data() {
    return {
      restaurants: [
      ],
      state1: '',
      state2: ''
    };
  },
拉取输入建议的方法:
    loadAll() {
      this.$http.get("http://localhost:8081/student?name="+this.state2).then((res)=>{
        this.restaurants = res.data;
        console.log(this.restaurants)
      }).catch(()=>{

      });
    },
匹配输入建议的方法:
    querySearch(queryString, cb) {
      let restaurants = this.restaurants;
      let results = queryString ? restaurants.filter(this.createFilter(queryString)) : restaurants;
      // 调用 callback 返回建议列表的数据
      cb(results);
    },
    createFilter(queryString) {
      return (restaurant) => {
        // console.log(restaurant.name.toLowerCase())
        console.log(queryString)
        return (restaurant.value.toLowerCase().indexOf(queryString.toLowerCase()) !==-1);
      };
    },
用户选择后执行的方法:
    handleSelect(item) {
      console.log(item);
    }
总体:
<template>
  <el-row class="demo-autocomplete">
    <el-col :span="12">
      <div class="sub-title">输入后匹配输入建议</div>
      <el-autocomplete
          class="inline-input"
          v-model="state2"
          :fetch-suggestions="querySearch"
          placeholder="请输入内容"
          :trigger-on-focus="false"
          @select="handleSelect"
          @input="loadAll"
      ></el-autocomplete>
    </el-col>
  </el-row>
</template>

<script>
export default {
  data() {
    return {
      restaurants: [
      ],
      state1: '',
      state2: ''
    };
  },
  methods: {
    querySearch(queryString, cb) {
      let restaurants = this.restaurants;
      let results = queryString ? restaurants.filter(this.createFilter(queryString)) : restaurants;
      // 调用 callback 返回建议列表的数据
      cb(results);
    },
    createFilter(queryString) {
      return (restaurant) => {
        // console.log(restaurant.name.toLowerCase())
        console.log(queryString)
        return (restaurant.value.toLowerCase().indexOf(queryString.toLowerCase()) !==-1);
      };
    },
    loadAll() {
      this.$http.get("http://localhost:8081/student?name="+this.state2).then((res)=>{
        this.restaurants = res.data;
        console.log(this.restaurants)
      }).catch(()=>{

      });
    },
    handleSelect(item) {
      console.log(item);
    }
  },
  mounted() {
  this.loadAll();
  }
}
</script>

<!-- Add "scoped" attribute to limit CSS to this component only -->
<style scoped>
h3 {
  margin: 40px 0 0;
}
ul {
  list-style-type: none;
  padding: 0;
}
li {
  display: inline-block;
  margin: 0 10px;
}
a {
  color: #42b983;
}
</style>
效果:
3-路由安装和使用
安装命令:
npm install vue-router --save
报错,根据提示加参数:
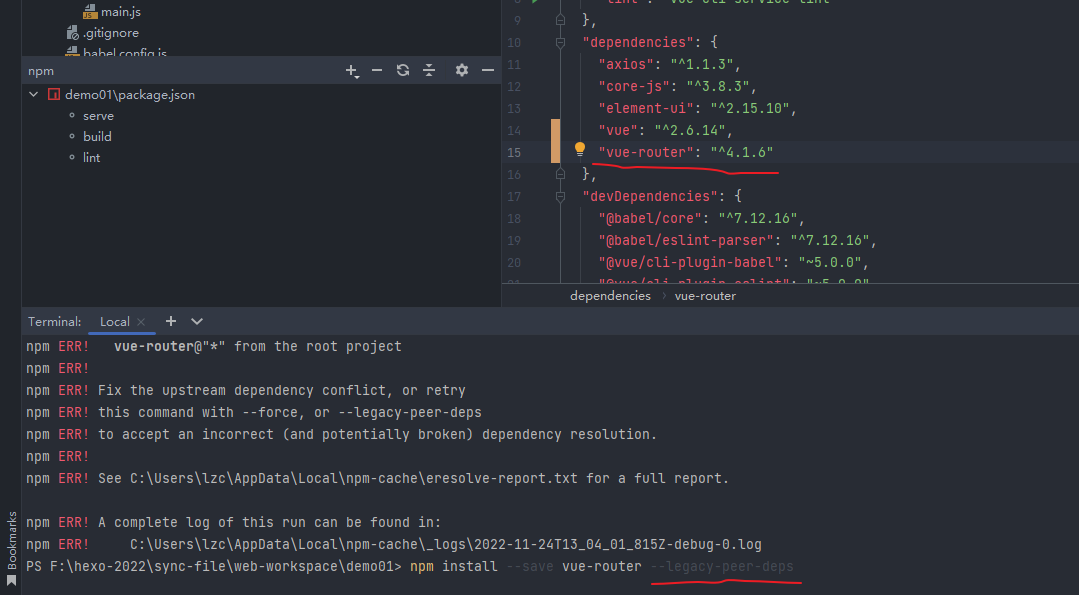
安装好后,在src下创建文件夹router,再创建index.js,在js里面配置路由:
配置好两个页面,一个是之前做的带输入建议的输入框,一个是登录页面,刚建的还没写内容。
import Vue from 'vue'
import Router from 'vue-router'
import LoginForm from '@/view/LoginForm'
import InputSelect from "@/components/InputSelect";

Vue.use(Router)

const router = new Router({
    mode: 'history',
    base: "/",
    routes:[
        {
            path: "/LoginForm",
            name: "LoginForm",
            component: LoginForm
        },
        {
            path: "/InputSelect",
            name: "InputSelect",
            component: InputSelect
        },
    ]
})

export default router
在App.vue添加路由视图
<template>
  <div id="app">
<!--    <InputSelect msg="Welcome to Your Vue.js App"/>-->
    <router-view/>
  </div>
</template>
在main.js导入路由并使用:
import router from "./router";

new Vue({
  render: h => h(App),
  router
}).$mount('#app')
启动,没效果的话,检查版本:
package.json:
  "dependencies": {
    "axios": "^1.1.3",
    "core-js": "^3.8.3",
    "element-ui": "^2.15.10",
    "vue": "^2.6.14",
    "vue-router": "^3.5.3"
  },
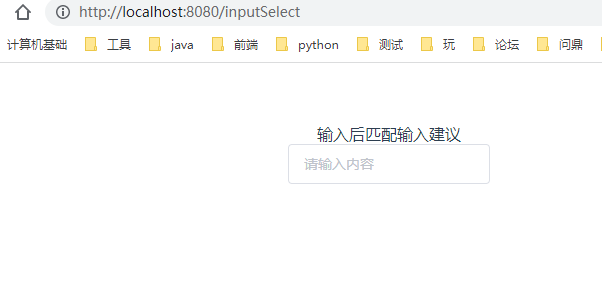
启动,访问:
4-component标签实现动态加载组件学习
工作需要,根据不同的业务场景,渲染不同的表单给用户进行填写。
Loading...